3-Step Overclocking Guide for Sandy Bridge v0.1 Beta

Unlock the power of your Sandy Bridge CPU with our easy 3-step overclocking guide, version 0.1 beta. Boost your system's performance today!

Sandy Bridge v0.1 Beta Overclocking

Unlock the full potential of your Sandy Bridge v0.1 Beta processor with our straightforward three-step overclocking guide. Overclocking can transform your computing experience by enhancing the processor's speed and efficiency, making it ideal for those who demand peak performance from their systems. Whether you are into gaming, video editing, or heavy computational tasks, this guide will help you boost your CPU’s capabilities to meet your needs without the complexities often associated with performance tuning.

Understanding the benefits of overclocking for performance enhancement is crucial, especially for users of the Sandy Bridge v0.1 Beta processor. By increasing the clock speed beyond what is factory-set, you can achieve faster processing times, reduced lag in intensive applications, and smoother overall performance. This guide aims to demystify the overclocking process, ensuring that even novices can safely and effectively enhance their system's performance and enjoy a superior computing experience.

Steps in Overclocking of Sandy Bridge v0.1 Beta

Step 1: Preparation

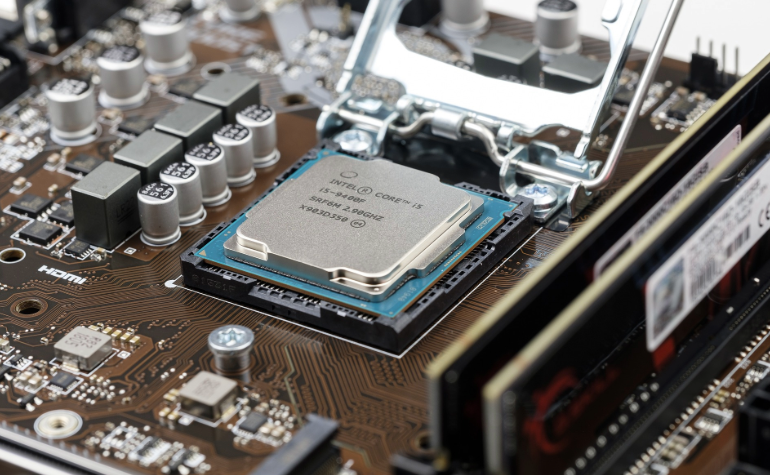
Embarking on the overclocking journey with your Sandy Bridge processor begins with thorough preparation. This foundational step is crucial to ensure that the process is both safe and effective. It involves gathering the right tools and software, understanding the limits of your hardware, and implementing safety measures to protect your system. Proper preparation not only enhances the success of your overclocking efforts but also minimizes the risk of damage to your components, setting the stage for optimal performance enhancements.

Gathering Necessary Tools and Software: Listing essential overclocking utilities

  • CPU-Z and HWMonitor: Essential for monitoring your CPU’s performance and temperatures in real-time.
  • Prime95 or IntelBurnTest: For stress testing the CPU to ensure stability at higher clock speeds.
  • BIOS Update Tools: Ensure your BIOS is up-to-date to provide advanced control over hardware settings and potential performance improvements.

Understanding Your System's Limits: How to identify your CPU's baseline performance

  • Baseline Testing: Run your CPU at stock settings and record performance metrics using benchmarks like Cinebench or PassMark. This will provide a reference point for future comparisons.
  • Thermal Limits: Monitor the maximum temperature your CPU reaches under load, as exceeding this can lead to hardware failure.
  • Power Supply Adequacy: Verify that your power supply unit (PSU) can handle the increased power demand of overclocked components.

Safety Precautions: Ensuring a safe overclocking process

  • Adequate Cooling: Confirm that your cooling system is sufficient to handle the extra heat generated by overclocking.
  • Incremental Changes: Adjust settings gradually to avoid sudden system stress. Small increments are key to finding the stable maximum performance level.
  • Backup Important Data: Always back up important data before beginning the overclocking process to avoid data loss in case of a failure.

By methodically preparing your system, assessing its baseline capabilities, and taking all necessary safety precautions, you can embark on overclocking your Sandy Bridge processor with confidence. This careful preparation not only ensures a higher success rate but also prolongs the lifespan of your system components by avoiding undue stress and overheating. As you progress through the overclocking process, these preparatory steps will serve as a critical foundation for achieving enhanced performance safely and effectively.

Step 2: BIOS Configuration

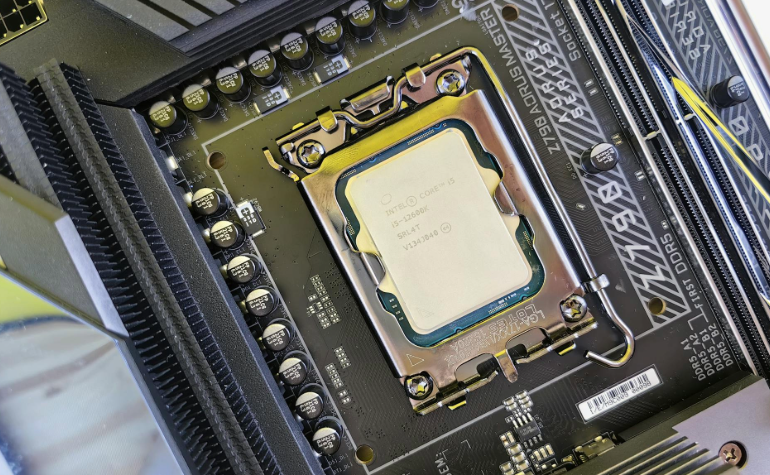
The second phase of overclocking your Sandy Bridge processor involves adjusting settings within the BIOS. This critical step allows you to fine-tune the processor and memory settings to achieve optimal performance levels. Proper BIOS configuration is essential as it directly influences the stability, efficiency, and overall capability of your overclocked system. Understanding how to safely and effectively navigate and modify BIOS settings can unlock your CPU's potential and lead to significant performance gains.

Accessing BIOS: Instructions on entering your system's BIOS

  • System Reboot: Begin by restarting your computer. As the system starts, you will need to enter the BIOS menu.
  • BIOS Key: Immediately press the designated key repeatedly; common keys include Delete, F2, F10, or Esc, depending on the motherboard manufacturer.
  • Entering Setup: Once you press the correct key, you will access the BIOS setup utility where you can modify various system settings.

Adjusting Processor Settings: Modifying CPU multiplier and voltage settings

  • CPU Multiplier: Locate the CPU multiplier option within the BIOS. This setting may also be termed as 'CPU Ratio.' Increasing the multiplier will raise the CPU clock speed, enhancing performance.
  • CPU Voltage (VCore): Adjust the CPU core voltage cautiously to provide sufficient power for the increased clock speed. It’s crucial to increase the voltage in small increments to avoid excessive heat and potential damage.

Memory and Voltage Tuning: Tips for optimizing RAM and CPU power delivery

  • RAM Frequency: Increase the memory frequency settings to speed up data transfer between the CPU and RAM. This setting is often found under advanced memory settings.
  • DRAM Voltage: As you increase RAM speed, you may also need to adjust the DRAM voltage to stabilize the higher memory frequencies.
  • Testing for Stability: After each adjustment, use memory testing tools to ensure stability before finalizing settings.

Proper BIOS configuration is pivotal in achieving a successful overclock. By carefully adjusting the CPU multiplier, voltage settings, and optimizing RAM performance, you can maximize the capabilities of your Sandy Bridge processor. It is important to proceed with caution, making incremental changes and constantly monitoring system stability and temperatures. Through meticulous tuning and regular performance checks, you can enjoy the benefits of overclocking while maintaining a stable and efficient system. This approach not only enhances your computing experience but also extends the life of your components by ensuring they operate within safe parameters.

Overclocking Guide for Sandy Bridge v0.1 Beta

Step 3: Stability Testing and Monitoring

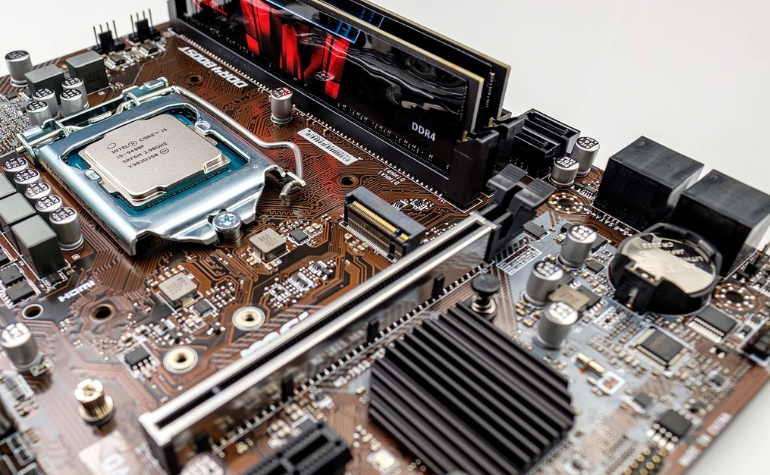
The final step in the overclocking process for your Sandy Bridge CPU involves thorough stability testing and continuous monitoring. This crucial stage ensures that the overclocked system is stable and reliable under various workloads, helping to prevent any long-term damage due to overheating or overvoltage. Proper testing and monitoring can also help validate the performance gains achieved through overclocking, giving you a clear picture of how the modifications have enhanced your system’s capabilities.

Using Stress Testing Software: Recommended tools for ensuring stability

  • Prime95: Widely used for its intense stress tests that push the processor to its limits, ideal for checking stability.
  • IntelBurnTest: Known for its quick and heavy loading tests, which are great for Intel CPUs like Sandy Bridge.
  • AIDA64: Offers a comprehensive suite for testing stability, including CPU, RAM, and disk stress tests.

Monitoring System Temperatures: How to keep track of critical temperature thresholds

  • HWMonitor: Tracks real-time temperatures, voltages, and fan speeds, providing a detailed overview of the system’s health.
  • Core Temp: Focuses on CPU temperature monitoring and can alert you if temperature thresholds are exceeded.
  • Customize Alerts: Set up temperature alerts to notify you immediately if the CPU temperature approaches critical levels.

Benchmarking Performance Gains: Assessing the improvements in system performance

  • Cinebench: Measures the CPU’s rendering capabilities, useful for comparing performance before and after overclocking.
  • 3DMark: Tests overall system performance, especially useful if you are gaming or using graphics-intensive applications.
  • UserBenchmark: Provides a broad performance overview, allowing you to compare your system’s performance against other similar systems.

Successfully overclocking your Sandy Bridge CPU not only requires careful tuning but also diligent monitoring and testing. By rigorously applying stress tests, you can ensure that your system remains stable under all conditions. Regular monitoring of system temperatures helps in maintaining optimal performance without risking damage to your CPU or other components. Finally, benchmarking the performance gains allows you to objectively measure the success of your overclocking efforts, ensuring that the enhancements meet your expectations. This comprehensive approach ensures that your system is not only faster but also stable and efficient, allowing you to rely on your overclocked CPU for everyday tasks and demanding applications alike.

Advanced Overclocking Techniques

For those who have mastered the basics of overclocking Sandy Bridge processors and are looking to push their systems even further, advanced overclocking techniques can unlock additional performance gains. This section dives into the finer aspects of CPU tuning, providing guidance on how to fine-tune your processor for maximum performance and how to effectively deal with the limits of overclocking. By applying these advanced strategies, you can optimize your system's performance beyond standard overclocking methods.

Fine-Tuning for Maximum Performance: Adjusting additional parameters for optimal results

  • Adjusting LLC (Load-Line Calibration): Improve voltage stability under load by tweaking the LLC settings, which helps to combat voltage droop during heavy CPU usage.
  • Refining Clock Skew: Manipulate the clock skew settings to enhance signal timing, potentially allowing for higher stable overclocks.
  • Experimenting with Multi-Core Enhancement: Enable or disable Multi-Core Enhancement to see if it offers stability at higher frequencies, depending on cooling capabilities and individual CPU variances.

Dealing with Overclocking Limits: How to recognize and respond to stability barriers

  • Identifying Stability Limits: Use stress testing software to determine the highest stable clock speeds before encountering errors or system crashes.
  • Voltage Thresholds: Recognize the safe voltage limits for your CPU to prevent long-term damage. Consult specific CPU and motherboard documentation for maximum recommended voltages.
  • Thermal Constraints: Monitor temperatures closely; if thermal limits are reached, consider enhancing your cooling solution before proceeding with further overclocking.

Overclocking a Sandy Bridge processor using advanced techniques requires a careful balance between ambition and caution. By fine-tuning additional parameters, enthusiasts can extract every ounce of performance from their CPUs, but this must be done within the confines of thermal and voltage safety limits. Understanding these limits is crucial to maintaining the longevity and stability of your system. With the right approach and tools, advanced overclocking can lead to significant performance improvements, making your computing experience faster and more efficient. Remember, the key to successful overclocking lies not just in pushing for higher frequencies but in achieving a stable, reliable setup that enhances your daily computing tasks.

Troubleshooting Common Overclocking Issues

Overclocking, while beneficial, can often lead to various challenges that need effective troubleshooting to maintain system stability and performance. This section covers common issues encountered during the overclocking process, such as system instability and overheating. Understanding how to quickly and efficiently resolve these issues ensures that your overclocked Sandy Bridge processor runs smoothly and reliably, maximizing the enhancements you've applied without compromising the health of your system.

Handling System Instability: Solutions for common problems like system crashes or freezes

  • Incremental Adjustments: If your system crashes or freezes, reduce the overclock in small increments until stability is restored. This often involves lowering the CPU multiplier or adjusting the voltage settings downward.
  • Enhance System Cooling: Ensure that your cooling solutions are sufficient. Overheating can cause instability, so improving airflow or upgrading cooling components may help.
  • Update BIOS and Drivers: Keeping your BIOS and all system drivers up to date can resolve underlying stability issues that may not be directly related to overclocking but can affect overall system performance.

Resolving Overheating: Effective cooling strategies to maintain safe operating temperatures

  • Optimize Airflow: Ensure that your case has adequate ventilation. Adding more or better-quality fans can significantly improve airflow, reducing CPU temperatures.
  • Consider Liquid Cooling: For high overclocks, air cooling might not be sufficient. Liquid cooling systems offer superior temperature management and can help maintain safer operating temperatures under load.
  • Regular Maintenance: Keep your cooling systems clean and free of dust. This maintenance can greatly improve their efficiency and effectiveness in heat dissipation.

Successfully troubleshooting common overclocking issues is crucial for maintaining an optimized, overclocked system. Handling system instability by making careful, measured adjustments helps find a balance between performance gains and stable operation. Similarly, addressing overheating with improved cooling solutions ensures that your system operates within safe temperature ranges, thus extending the lifespan of your hardware. Through vigilant monitoring and proactive maintenance, you can enjoy the benefits of an overclocked system without the drawbacks, ensuring both performance enhancement and system durability.

Popular Articles

Cooler Master H612PWM Review: Top Performance & Quiet

Corsair Dominator Platinum: High-Performance RAM

Revolutionizing CPU HSF Testing: New Techniques & Insights

Thermaltake Element V Black Edition Review: Ultimate Performance

Looking for Web Design and Development?

We Are Here To Help You Stand Out.
Contact Us
Know More